 My Mikrotik RB100AHx4 network router has only 1 Gbps ports and recently I have started noticing the need for a bit more bandwidth toward my NAS. As this router has no SFP+ ports, there is no easy way to increase speed. However, since my NAS machine has 4 network ports, there is a way forward - LACP.
While there are many ways to aggregate network links, I found 802.3ad link aggregation is the way to go. Not only all modern network devices support it but it also comes almost without any costs in the terms of CPU processing. To make it better, it also allows unbalanced links (e.g. router is LACP while NAS is just a single port setup). While this is not a desired end state, it makes both initial setup and potential later troubleshooting much easier. While not the focus of my setup, additional resilience of link to the cable damage is nothing to frown about either.
To create link aggregation on Mikrotik's side, one has to first remove all ports from existing bridge (Bridge, Ports). Then we can create the new bond interface (Interfaces, Bonding) with mode set to 802.3ad and transmit hash policy set to layer 2 and 3. All interfaces we want to bond together should be listed under slaves. Assuming we want a 3-port bond, it would be something like this:
Terminal/interface bonding
add name=bonding-nas slaves=ether1,ether2,ether3 mode=802.3ad transmit-hash-policy=layer-2-and-3
Once bond interface is created, just add it to a bridge as you would any other interface (Bridge, Ports) and your work on Mikrotik side is done.
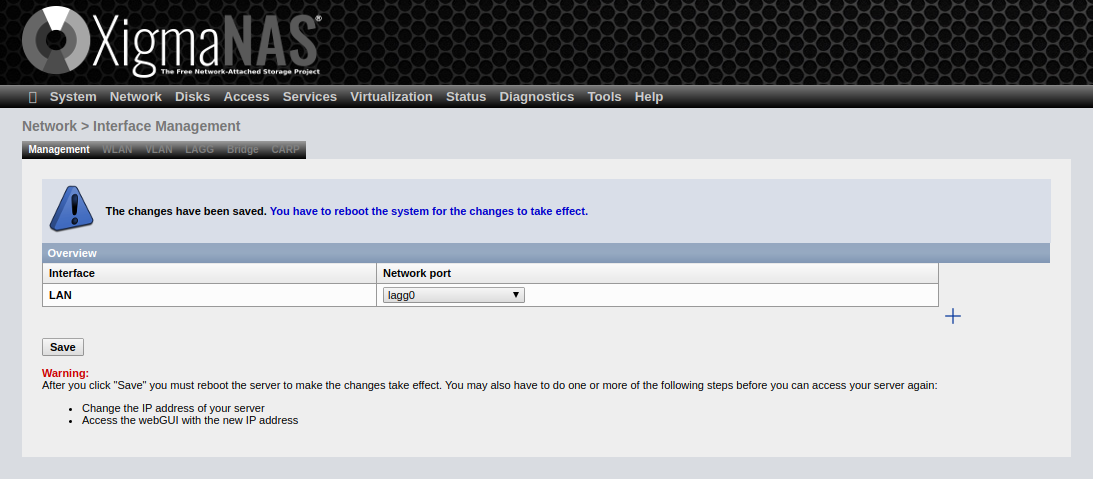 On XigmaNAS, setup is equally easy. Due to LACP gracefully handling our currently asymmetric link, we can simply connect to the web GUI as we normally would. There go into
 Network, Interface Management, LAGG tab. Add a new interface selecting LACP (Link Aggregation Control Protocol) as protocol and by clicking all the ports you want to participate. Then go back to Network, Interface Management and select newly created interface (lagg0) from LAN's dropdown menu. Once you save the settings, you can go ahead and reboot your NAS.
Enjoy your bandwidth and resilience increase!
While LACP is nice don't expect wonders from it. As far as resiliency goes, things are as you would expect them - if you set it up with 3 ports as I did, you can lose 2 cables before connectivity is gone. For bandwidth things are not as simple. Just having 802.3ad link makes no difference if you have just a single connection. All packets are still going to travel over only a single cable (mandatory to avoid packet reordering). Since most test tools use just one connection, you will see no improvement.
Even when you are dealing with multiple connections, you depend on the gods of hashing. As your hash space is only N wide (3 for examples above), you might have multiple connections sharing the same hash and thus the same physical link while rest of links stay bored. Only if you have many different connections you can count on approximately equal traffic distribution and full benefits. For my NAS setup this is not really an issue as I can count on multiple connections from either one (SMB3) or multiple machines.
Not a magic bullet but it's a cheap way to double bandwidth as long as you are aware of limitations.
PS: Once setup is done, you can try setting up fast LACP rate (lacp-rate=1s). This will enable for faster detection of link failures when interface itself is up but there is a problem between devices (e.g. you have damaged cable or misbehaving switch in between). In reality, you probably don't need it but you might as well turn it on if network equipment supports it.
PPS: Asynchronous port setup is beneficial only during deployment. If you set 4-port LACP on one side and 2-port LACP on another, you are not reaping any benefits for two extra ports. When you are done with configuration you always want the same port count on both network devices.