As someone who like to annoy folks doing an actual electrical work, I discussed topic of Wago connectors multiple times. First part of discussion is inevitably my (correct) pronouncation of Wago. It’s with with Wag as in Wagner, not as in wage. After that initial vorspeiz, topic inevitably goes to the superiority of the mighty Wire Nuts.
If you are from Europe, you might wonder what the heck is a wire nut? Well, do you remember old times when people just twisted wires together and wrapped them in some electrical tape? Wire nut is that same thing, just with plastic. And I personally find them lacking.
During cleaning of in-wall heaters (American thing, don’t think too hard about the wisdom of placing a furnace into a wooden wall structure), I found wire nuts a really problematic choice. To properly clean the heater, you really need to disconnect wires. With wire nuts you either untwist them, forcing you to unbend wires when you want to reconnect them. Or, you cut the wire nut and just later reterminate the connection with a new wire nut. Both of these choices usually lead to shorter and shorter wires each time - since even unbending wire that was once in a wire nut more often than not leads to breaking it. And, since most heaters have stranded wire, mess is even greater than what you get with a stranded wire.
If you use Wago to terminate those connections, you solve all your problems as wago accepts both stranded and solid wire. Now you can disconnect a solid wire from connector whenever you need cleaning. And reconnecting them again is a breeze, without any damage occuring in the process.
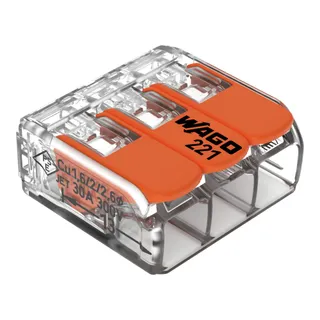
In junction box you have even easier time. Not only you can fold wires neatly in groups but you can also measure voltage. Every Wago connector has a hole just big enough for multimeter probes to fit.
How do the “wire nut” people measure voltage? Well, they try not to. I’ve seen electricians try 100 different things before resorting to an actual measurement. And I don’t blame them - I would do the same if measuring stuff required me to unbundle all the wires.
That said, connection with wire nuts can be better. Multiple people tested them and, under the full load, difference can be a staggering few degrees. It’s a meaningless difference.
I’ve also heard that Wago is not durable - mostly because it’s not pure copper. Having gone through period of dealing with issues between aluminium and copper connections, Americans are justifiably wary of issues that can arise when mixing materials. But not all “silvery” materials are aluminium. They might be copper with oxidation protection layer. Guess what, if you check a wire nut, you won’t see exposed copper there either. I guess logic there is that, in case of the wire nut, it’s an oxidation prevention. In case of Wago, it’s a durability issue.
The National Electrical Code is the only relevant source of truth. And Wago connectors meet UL 486C requirements. Same as wire nuts. Even their maximum temperature of 105 °C is the same.
Using one or other might be a matter of cost (wire nuts are cheaper). Or it might be matter of preference (wire nuts are belowed here). But it cannot be matter of performance. As long as they have the same (and sufficient) rating, wire nuts and wago connectors are interchangeable.
Me? I am going to continue making my live easier by replacing every electrical circuit I touch with something that’s actually user-friendly.
PS: If you were wondering how Wago 221 got their name, convert 105 °C to °F.


